
Discoloration on the ceiling is most certainly a cause for concern.
Brown spots or stains on the ceiling are most commonly the product of water damage.You will see a light or dark discoloration on the ceiling to indicate where the problem is.
However, there are non-water related problems that can cause these brown spots & Stain on your Ceiling as well.
When you see a brown spot appear, dealing with it quickly can help prevent a more costly repair later on.
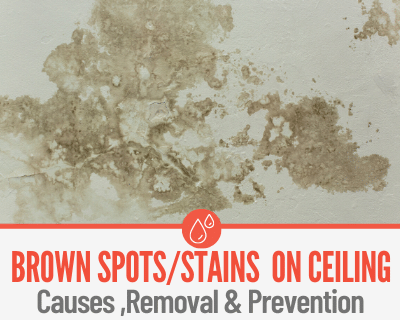
Brown Spots On Ceiling – What are they?
Being able to identify what type of brown spot you have can tell you how quickly you need to respond.
1.Small Brown Spots
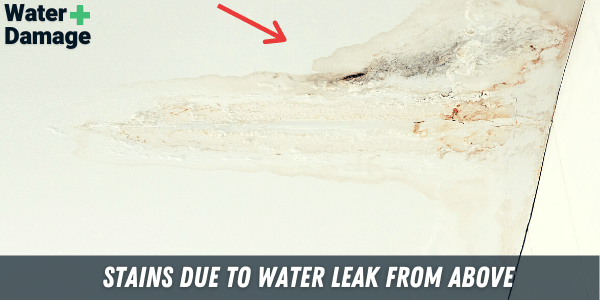
A small brown spot hopefully indicates a small problem. Most likely from moisture, a small brown spot can be from condensation or a leak from above.
2.Dry Brown Water Damage Stains
A dry brown spot indicates that there may be a leak that happens every so often from rain, a leaking pipe, or HVAC unit.
If the stain has time to dry, then it is not a constant leak and you should get it fixed immediately.
3.Mold
Mold grows in small spores from moisture. If the brown stain you’re looking at is fuzzy and textured, it is mold.
As mold grows it gets darker, so if it is lightly colored and yellowish or brown, you have caught it before it grows into something more dangerous.
4.Ghosting
Ghosting refers to the most mysterious type of brown spot.
This discoloration comes from dust, soot, moisture, and other things that can travel through the air, such as dust when charged with static electricity.
Ghosting tends to occur in the pattern of your home frame.
This is because framed areas tend to get colder, allowing warmer moisture to collect and cause discoloration.
Most Common Causes
While we can tell you that brown spots are due to water or moisture, we cannot tell you how serious the issue is without looking into the cause futher.
Brown Spots on Ceiling- But no Leak…
If you have a brown spot with no water damage, you are probably dealing with ghosting.
These brown spots on ceiling happen slowly over time and become noticeable once the substance has collected enough to create a color able to be seen all the way up on your ceiling.
Typically there is a lack of insulation that create just enough moisture for these particles to stick in various patterns along your housing frame.
By the time you notice ghosting, it may have caused a stain on the ceiling instead of just a simple collection of the dirt and dust.
Condensation Problem
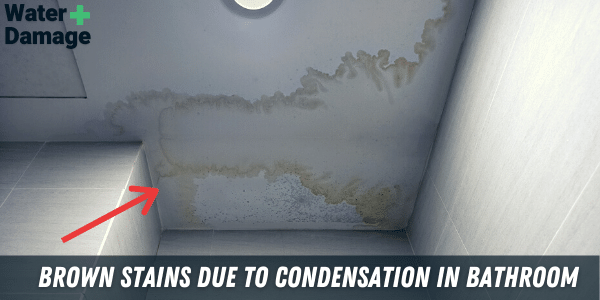
Alternatively, you could have a condensation problem in your home as well.
If you’re lucky to not see any issues with a leak, but the brown spot still looks like water damage, the condensation can collect in various areas of your ceiling.
This happens because the moisture in the air is warm and lands on a colder surface.
This would be similar to why ghosting happens, except without the dirt and dust particles.
Mold
If you have a moldy brown spot on your ceiling, it most likely started as water damage and has grown moldy as the stain gets darker and/or bigger.
However, mold can also grow from any type of moisture if left untreated.
Too much humidity, leaky pipes, and collected condensation can cause mold to have the conditions needed to grow.
This is why it is important to identify the cause before treating the brown spot, as we do not want the spot to grow back.
Water Damage on your Ceiling?
Call 844-488-0570 for a Risk Free estimate from a Licensed Water Damage Restoration Specialist in your area.
We Can Help Find the cause of the Ceiling Damage, Repair it & Prevent the spots from Returning.
How to Clean & Get Rid of Brown Ceiling Stains
Water Damage
Water damage on ceilings always happens from a collection of moisture, but not always from a leak.
If you are dealing with water damage not caused by a leak, you will want to let the brown spot dry then wipe the area with a bleach solution.
In order to clean the brown stains and spots from your ceiling wipe the area with a mixture of:
- one part bleach
- sixteen parts water
If you prefer a non-bleach solution, mix together:
- one part baking soda
- five parts distilled vinegar
- five parts water
This is to make sure the area is clean and free of any potential mold. You are most likely unable to wipe away this stain, so it is important to clean the area before painting.
Once the area has dried, coat it with a stain blocking primer. Let the primer dry.
Once dry, repaint with a flat acrylic paint.
If the water damage is from a leak, you will need to get the leak fixed first. If not, your efforts will be in vein.
If you are unsure, always call a professional with the proper knowledge and tools to help you.
Once the leak is repaired, you will need to replace the ceiling drywall before repainting it.
You can find steps on how to do that below under “In Case it Can’t Be Completely Cleaned.”
Peeling or Flaking Ceiling
If your ceiling is peeling and you do not need to replace the drywall, there are steps you can take to fix this on your own.
1.Sand the Flaking
Use sanding paper to smooth the ceiling where the peeling or flaking is taking place. I would recommend using at least 150 grit sandpaper (the higher the grit number, the finer the grit paper is).
Wipe the area to be free of any dust left by sanding.
2.Fill in with Patching Compound
Use a putty knife and patching compound to create a thin layer on the area in need of patching.
Once dry, add another coat.
3.Sand & Repaint
Once the second coat is dry, sand the area again and wipe free of the dust.
Retexture the area if needed. Now you’re ready to repaint.
Typically, you would use an oil-based primer followed by a flat acrylic paint. However, if you know your house is different, use the paint to match the rest of your ceiling.
We recommend using a stain blocking primer to help prevent discoloration in the future.
Mold
When mold is the culprit, you will need to use a mold remover to clean theses brown spots from your ceiling to help prevent it from returning.
When cleaning mold, it is best to make sure your skin is covered and do your best to prevent spores from spreading to other areas of the room.
Before cleaning the brown mold stains of your ceiling, spray it with water to help reduce possible spores from spreading.
You can find a premade mold removing mixture at your local hardware store. You can also make your own mixture with simple at home ingredients.
In order to clean mold wipe the area with a mixture of:
- one part bleach
- sixteen parts water
If you prefer a non-bleach solution, mix together:
- one part baking soda
- five parts distilled vinegar
- five parts water
Ghosting
Ghosting stains start out relatively easy to wipe if caught early enough. However, they may also require fresh paint if they are left to grow for too long.
When the dirt, soot, or dust particles first start to collect, you can use a damp towel to clean these spots from your ceiling.
If left over time, they can cause brown stains on the ceiling. Don’t feel bad if this happens, as ghosting can be hard to see at first.
The good news is that a ghosting stain can be covered with a coat of paint.
In Case It Can’t be Completely Cleaned
While attempting to wipe away the brown stains from your ceiling with various concoctions can help, sometimes it just isn’t enough.
You might have to break out the paint brushes to have a visually appealing ceiling again.
Before painting, always use a stain blocker to prime the area. Using a stain blocker, helps prevent the brown spots & stains from returning.
However, a stain blocker does not totally guarantee a brown spot will not return again if you do not prepare the area and use the stain blocker properly.
Make sure you have cleaned the area of mold, dust, and dirt before applying the primer for the best result.
Only once it has dried should you apply your fresh coat of paint.
If you have water damage from another source (e.g. a huge spill upstairs that caused a water damage stain on the bottom floor ceiling), you can simply paint over the stain after the brown spot is completely dry.
Before doing this, make sure your ceiling is thick enough to withstand being coated with paint with falling or causing further damage.
If your ceiling has become weak, unable to dry, or handle paint, you may need to replace the drywall before painting to ensure a solid job.
If it is droopy, saggy, or otherwise thin, follow these instructions. Remember that if you are unable, always call a professional to help you get the job done properly.
Remove the Old Drywall
Cut out & Remove the old drywall. Make sure there are no wires or pipes in your way.
To properly remove the drywall, use a drywall saw to saw away the area of removal until you hit a stud. Once you hit the stud, you can pull the damaged area off the ceiling with your hands.
Remove insulation from the area you will be replacing.
Attach New Drywall
Make sure your replacement drywall is the same thickness as your current drywall before installing.
Measure the area and cut your drywall to fit the spot of repair.
Nail/screw your new piece into the spot on the ceiling. You might need someone to hold it up for you while you attach it.
Use Joint Compound
Use paper tape to tape the outside edges of your new piece and add joint compound using a putty knife.
Once dry, add another layer of joint compound.
If after the second coat, the fill is still uneven, add another coat until the new section is flesh with the old.
Sand & Paint
Once dry, sand the area.
If your ceiling is textured, you can now reapply the texture to the new drywall section.
Once the texture is dry (or if you have no texture on your ceiling), you can prime and repaint your ceiling to look good as new.
Make sure to put the insulation back in this area, either from attic above or before you install the new drywall.
Avoiding Brown Spots on your Ceilings in Future
Ghosting
In order to avoid ghosting from recurring, it is recommended to clean the spot regularly.
Since the airflow in your home is probably a consistent pattern, ghosting is likely to recur in the same spot.
You may also consider improving the insulation in your attic.
Since ghosting typically happens along your ceiling joints and rafters, adding some insulation can create a better barrier to stop humidity from collecting in these colder spots.
Mold
As mentioned above, mold grows from moisture. In order to prevent its growth in the future, you may want to create a routine of wiping mold-prone areas to keep them dry.
You can also add more insulation to these areas in the attic to help prevent the collection of moisture.
Water Damage
Check your roof and pipes regularly to catch any potential leaks before they cause a big problem.
When to call a Professional
If you find that your brown spots on your ceiling are due to water damage or a leaking pipe, it is important to contact a professional. It would be tragic to wait too long and have to replace more than a small section of ceiling.
While this article gives you many ways to treat and repair brown spots, never take on a project as serious as replacing your ceiling drywall if you are not confident in your abilities.
Professionals have the proper training, experience, and tools to help you repair a problem quickly, whether it be a leaking pipe or sagging ceiling.
We have Water Damage Restoration Technicians that can help find the cause of the ceiling damage & Fix your Ceiling
For Disasters of all Sizes,available in 95% of the USA