
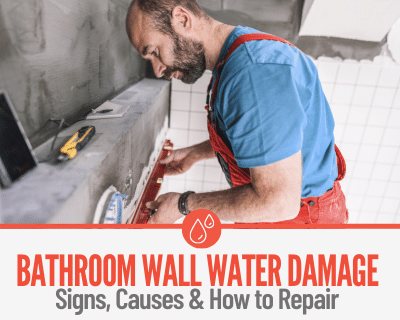
One of the more common places that water damage can occur in a home is within bathroom walls, given the nature of water flowing through toilet flushes, sinks, and shower/tubs.
How can you Spot Water Damage in your bathroom walls though, and if you do what are some steps to follow for repair?
Below we outline some of these causes and guide you through a repair protocol that may come in handy, along with approximate costs of repair.
Signs of Water Damage in Bathroom Walls
1. Moldy/Musty Smell
This is a major red flag, and can often be an early sign that your bathroom walls may be experiencing water damage.
A smell that is musty or damp in your bathroom indicates the presence of mold and mildew in the walls/subfloor.
This happens because of poor ventilation in the bathroom area, meaning that moisture slowly builds up over time below the surfaces – leading to mold.
Hot showers do increase the chances of mold and mildew accumulating, especially around the walls surrounding your shower.
While it’s okay to notice small amounts of mold during your regular deep clean, if you notice larger-than-usual amounts that have a musty smell to it – then it’s likely an indication of a deeper water damage.
This may indicate that the drywall around your shower may have water damage that needs repairing or replacement.
2. Signs of Drooped Walls
Drywall that’s damaged eventually begins to warp or droop, and that’s because of the moisture surrounding it.
If the drywall in your bathroom appears bubbly, it often indicates damage as it begins to break apart into smaller pieces.
Another sign of a drooped wall is you’ll notice the paint on the drywall begin to peel off.
Minor peeling of paint in the long run is normal, especially because of hot water running in the shower.
But peeling that occurs quickly means that there’s an underlying water damage in your bathroom floors.
This can lead to a rotted drywall in the bathroom and eventually mold and mildew.
In this case, repairing the water-damaged drywall around your shower is a priority, before the formation of mold and mildew increases in your bathroom given the level of moisture the area is exposed to on a daily basis.
3. Grout or Caulk that Has Visible Gaps
If you notice any gaps in your shower caulk, tiles, or grout, this may indicate the seepage of water into the drywall while the water is running.
If this happens, the water that’s inside will eventually lead to a rotted drywall or even rotted studs in your bathroom wall – this will cause mold and mildew formation as well!
Mold and mildew have negative impacts not only on your property, but also pose a health hazard if not properly treated.
You want to make sure that you replace the rotted drywall in your water damaged bathroom wall to avoid further implications.
How to Repair Bathroom Wall Water Damage
Now, in the case of water damage and a rotted drywall in your shower – here’s where the repair and clean-up phase come into place.
Before attempting to address the repair though, you want to make sure that it’s safe to do so.
Water-related issues often mean contamination and exposure to hazardous chemicals, microbes, and bacteria – so dress appropriately.
Wearing PPE like safety glasses, rubber gloves, a face mask, and disposable or old clothes will come in handy.
Here are some repair steps you can take when it comes to repairing or replacing wet drywall in your bathroom:
1. Identify Affected Drywall Area & Remove Tiles
To start, you’re going to have to identify which area of the drywall seems to be affected.
As noted in the beginning of this guide, there are a couple of signs that indicate water damage to the drywall around your shower.
So, once you’ve figured that out – go ahead and safely remove the tiles using tools like a chisel.
Once the repair to the wet drywall has been accomplished, you can simply replace the tiles that were removed.
Once you’ve done this, you also need to remove the trim from the floor of the wall.
2. Remove Damaged Drywall
Using a utility knife, and after you’ve drawn around the affected area with the water damage, gently separate the damaged area of the drywall from the area that hasn’t been affected.
Once you’ve done this, safely remove the damaged drywall along with any nails/screws in the area.
3. Replace any Rotted Studs
While implementing the above step, if you notice that any of the studs have rotted you must replace them.
This will also help avoid any further damage later on.
4. Add New Drywall & Fill in Seams/Screw Holes
Once you’ve removed the rotted drywall in your bathroom wall, you want to measure the hole in order to replace it with new drywall.
Be sure to properly secure it with drywall screws once done. After that we will need to fill in any seams and screw holes.
Here, you want to make sure that you properly fill any screw holes using drywall mud.
You can then use drywall tape over the mud to ensure proper sealing.
You can repeat this process, of applying drywall mud over the raised bump, a couple of times until you can no longer see a bump and the area appears smooth.
5. Paint Drywall or/and Replace Tiles
If you are installing tile before this step you will also need to Paint on a Waterproof Membrane on your drywall.
Depending on the finish of your shower wall, once you’ve completed the above step you can go ahead and either paint your wall or replace the tiles.
Don’t forget to install a new base trim to seal in everything, and carefully apply silicone (watertight) to the corner where the drywall and shower wall appear.
Water Damaged Bathroom Walls?
Call 844-488-0570 for a Risk Free estimate from a Licensed Water Damage Restoration Specialist in your area.
We Can Help address the Cause of the Water damage & Repair any Water damage in your Bathroom Walls.
How to Prevent Bathroom Wall Water Damage
Prevention always is the best, there are a few things you can do to help prevent this water damage in the first place.
Regularly check the Shower Area for any Signs of Missing Grout or Cracked tile
First off, always check the shower area from time to time.
Signs of a missing grout or a cracked tile will cause the water to seep through the wall.
If this is the case, immediate repair is advisable.
Address any Plumbing leaks as soon as Possible
Second, to prevent any water damage in the drywall around your shower, get ahead of any plumbing-related issues as soon as you can.
Any leaks or rusty old pieces need to be addressed.
Good Ventilation is the key!
Third, ventilating the bathroom regularly by opening the window(s) if possible from time to time is a great idea.
Good ventilation also means ensuring that you have an effective exhaust fan installed in your bathroom.
These aid in lowering humidity, particularly during hot showers – reducing the chances of moisture-related issues and water damage to the drywall surrounding your shower.
How much Does it Cost to Repair Bathroom wall Water damage?
The exact cost of repairing rotted drywall, rotted studs, or other water damage in your bathroom walls may be difficult to estimate.
However, you can expect to spend anywhere between around $800 to $400 depending on the level of water damage and whether you’re repairing the damage yourself or seeking professional help.
Again, getting ahead of these water-related issues is very important in order to avoid and minimise such costly repairs.
This can be achieved by preventative maintenance, and proactively looking for signs of water damage around your shower walls during your deep clean.
Once the accumulation of moisture begins, your shower drywall is more than likely to experience water damage as a result.
When to Call a Professional
If the above steps of repairing the water-damaged drywall around your shower seem intimidating, then it’s probably a good idea to seek professional help.
Hiring a professional to deal with any water-related damage in your property is almost always the better choice.
A licensed professional will better determine the cause of the damage in your bathroom walls, as well as the level of damage to the rotted drywall.
Most importantly, if you’re going through your insurance company to potentially cover the cost of the repair – they will likely only do so if the job is done by a licensed professional.
As noted earlier, water-related damage in a home is specifically a problem that can prove hazardous to the health of those residing in the house.
If the water damage lingers longer than it should inside the drywall of your shower, you risk the growth of mold and mildew in that area and beyond.
In damp conditions like a bathroom, it is only natural that the risk of mold growth increases – also increasing the risk of respiratory allergy symptoms and exacerbates asthma for those who are sensitive to mold.
Hiring a professional to deal with the repair of a rotted drywall in your shower will also prove beneficial as they’ll also mitigate any mold and mildew residues.
We have Water Damage Restoration Technicians that can help Repair Water Damage in your Bathroom Walls.
For Disasters of all Sizes,available in 95% of the USA