
Water damaged Drywall walls or Ceiling? Don’t know how to take care of the damage or stain?
In this guide you will learn:
- What damage to look for when assessing your walls/ceilings,
- What paints and primers to use for drywall,
- What to do before painting your water damaged walls,
- How to paint over water damaged drywall/ceilings
Painting Water Damaged Drywall Walls
You may feel that a water-damaged wall is not an easy fix – but that’s not always true. This section will cover what signs to look for and what steps to take to fix your water damaged drywall.
Can Water Damaged Drywall be Painted?
Water damage to drywall walls normally occurs as a result of a leaky/burst pipe or plumbing unit in the interior of the wall. If the damage is not severe it’s possible to paint over the drywall and get rid of that nasty stain.
Depending on the severity of the water damage, you may be able to paint over the affected area. If the area is heavily damaged, replacing the drywall might be the best option first.
If the damage is not severe, and there is just a small leakage or stain, the drywall walls must first be completely dry and intact before you attempt to cover it with a fresh layer of paint. It’s also important to ensure that the leak or damaged pipe is taken care of before doing any other work.
Can You Just Paint Over Water Damaged Drywall?
It’s not as simple as just painting over a water damaged section of a wall. There may be serious underlying problems from the moisture. Things such as loose drywall sheets, blistered paint, wet drywall mudding, or sagging drywall detaching from the frame or studs.
Painting over this will not fix the main problem at hand, and if you do it will just end up looking sloppy. Further inspection needs to be done before applying a fresh layer of paint to the wall.
How to Prepare a Water Damaged Wall for Painting
There are a few steps to take to prepare your water damaged wall for painting:
- Make sure the structure behind your surface/drywall is not damaged, and free of moisture. If your frame structure is damaged, the wall will not hold for long.
- Secure any loose drywall in place with the studs or frame with the use of drywall screws.
- Ensure that your painting surface is smooth and level. Use of a putty knife or a straight edge to scrape off any old blistering paint or drywall mud is a good way to start getting a smooth surface.
You may also need to sand the surface with sanding paper to blend the materials.
- Be sure that your drywall wall is completely dry before painting its surface.
Water Damaged Walls?
Call 844-488-0570 for a Risk Free estimate from a Licensed Water Damage Restoration Specialist in your area.
We Can Help Dry out and Repair Water Damaged Walls
Best Paint/Primer to Use
There are a number of different paints and primers you can use, but it’s best to use an oil-based, stain-blocking, and mold-resistant primer. Make sure that the shade matches that of your current wall shade before using.
These primers and paints are made water insoluble, meaning that the existing stain cannot bleed through your new layer of primer/paint.
How to Paint Water Damaged Walls
There are steps you must take first before simply repairing the damaged drywall walls:
- First make sure that the drywall is still intact and properly attached to the studs or frame of the wall. If the drywall is loose, attempt to tighten it with the use of drywall screws.
If the damage is severe enough (sagging, rotted, growing mold from moisture) you may need to replace the drywall entirely before painting again.
- Look for signs of blistered paint and wet drywall mudding. If there is any, be sure to scrape off any excess mud or loose paint sections with a straight edge or putty knife. You want the surface to be as smooth as possible before reapplying new paint.
- Sand down the area to blend the surfaces together, creating a smooth level surface for applying paint.
- Apply a bleach solution to your wall, with one part bleach to three parts water. This will ensure your surface is clean and free of residue. Rinse the area lightly afterwards and allow the surface to dry.
- Apply a layer of primer to the affected surface. Allow the primer to dry completely before continuing.
- Apply a layer of paint to the layer of dried primer. Paint is usually necessary after the use of primer, as primer will often dry in an off color, and look funny in comparison to the rest of your wall. Finding the right shade of paint can fix that problem easily.
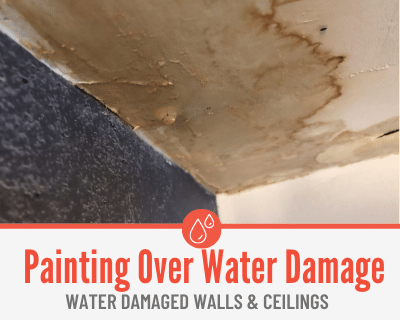
Painting Water Damaged Ceilings
Like walls, your ceilings may also suffer water damage from broken pipes or fixtures. This section will cover what to do when you encounter a water damaged ceiling.
Can Water Damaged Drywall Ceilings be Painted?
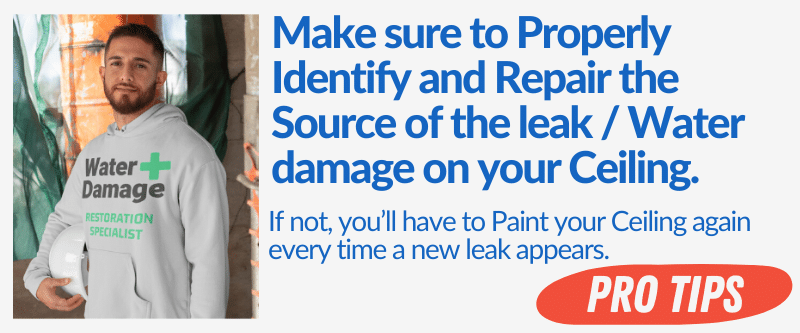
Water damaged ceilings can be painted just like walls, as long as the damage and moisture is not too severe. First find the root of the leakage, and fix it. Painting will not do any good without first stopping further damage to the ceiling.
Can You Just Paint Over Water a Damaged Ceiling?
Painting over the water damage in the ceiling is not recommended without first identifying the problem. Once the leak is taken care of, address the quality of your structure following the leak.
Make sure that your ceiling joists, tiles, studs, or other frame structures are free of water damage. A wet, weak frame won’t last long term and may need to be replaced. If the damage is mild enough, you may move on to priming and painting your ceiling.
How to Prepare a Water Damaged Ceiling for Painting
First, determine whether your drywall ceiling is a smooth surface or textured surface, this may affect how you want to go about painting your ceiling. A smooth ceiling surface can be done by using a paint roller, whereas a textured ceiling may be better painted using a spray form of paint.
Ensure that your ceiling structure is still sturdy, and will not weaken over time from the water damage. Once the ceiling is dry, you can begin to prime and paint the surface.
How to Paint a Water Damaged Ceiling
To fix and paint your water damaged ceiling, you need to:
- Ensure that the structure of your ceiling is dry and intact, and has not been weakened by the water damage. Sufficient water damage may result in your ceiling structure decaying and falling apart. If it’s just mild, continue to the next step.
- Check for any blistered or loose paint chips, or ceiling mud. Use a straight edge or putty knife to remove any excess old materials.
- Apply a bleach solution to your ceiling, with one part bleach to three parts water. This will ensure your surface is clean and free of residue. Rinse the area lightly afterwards and allow the surface to dry.
- Place a drip mat or towel on the floor to be sure that none of the excess paint will drop and stain your flooring.
- Apply your primer (preferably oil-based, water insoluble) to the affected area of the ceiling. One firm layer is all that is necessary. Allow the primer to dry before continuing to paint.
- Apply your paint (oil-based, water insoluble) to the layer of primer. You may use a paint roller for smooth surfaced ceilings, or a spray form of paint for a textured ceiling as it may be easier to do.
When to Call a Professional
If you have tried all of these options and steps, and still have not been able to repair your water damaged walls, it’s time to contact a professional.
A water damage restoration company has industrial-grade equipment and skills necessary to get rid of any remaining moisture and structural damage to your walls, and can repair them and paint them with proper techniques.
If you have any doubt in your wall/ceiling structure, and feel that the damage may be too extensive, be sure to contact a pro so they can assist you in proper repairs. Don’t take on a task that you feel may be beyond your experience.
We have Water Damage Restoration Technicians that can help Restore Your Walls and Ceilings.
For Disasters of all Sizes,Available in 95% of the USA