
Are you worried your bathroom floor might have sustained water damage?
Don’t panic! In this guide you will learn:
- How to identify bathroom floor water damage,
- Causes of Leaking water from your bathroom floor,
- How to Find & Repair the leak,
- How to Repair your water damaged bathroom floor.
Signs of a water damaged bathroom floor
Recurring mold or mildew: especially along the baseboards of your bathroom, mold and mildew like to grow in damp, wet environments.
Musty smell: earthy and damp, likened to dirty socks or rotting wood, as a result of volatile organic compounds released by mold as it grows.
Warped walls: as wood soaks up water and then dries, it expands and then shrinks, causing it to warp which may lead to wooden panels not fitting together like they used to.
Soft, “spongy” floor: as the subflooring of your bathroom begins to deteriorate, it may become soft, leading to each step feeling like you’re stepping on a cushion.
Gaps in the tile or caulking around your tub: as flooring continues to absorb water and shift around, things like the tiling or even the bathtub may not line up properly like they did before.
Cracked material: some materials that aren’t treated to be water-resistant on all sides may begin to crack or come apart if water is coming up from underneath them.
Mystery stains: another way water damage can manifest is the appearance of discolored stains on your bathroom floor, either in the flooring itself or as if they were seeping up the walls from where moisture is being wicked upward.
Next, let’s go over the different scenarios that could be causing said water damage.
Bathroom Floor Water Damage?
Call 844-488-0570 for a Risk Free estimate from a Licensed Water Damage Restoration Specialist in your area.
We Can Help Dry out & Repair your Bathroom Floor
Bathroom floor appears to be leaking water
First, you’ll need to determine where the leaking water is coming from.
Obvious areas to check would be any faucets or other water fixtures within the room, as well as all of the seals on any toilets, tubs, or showers.
An easy way to check shower doors in bathroom for potential leaks is to splash water on/around the door itself, as well as the frame.
Leaks may take a few minutes to show up, so be patient.
If the door seals with rubber gaskets, or utilizes a rubber door sweep, you’ll want to inspect them carefully for gaps or any damage. If your shower uses a curtain, inspect the floor for standing water after your next shower.
Things like paint peeling or flaking away and a chalky look to the wood finish near the shower could also be strong indicators you have a leak somewhere nearby.
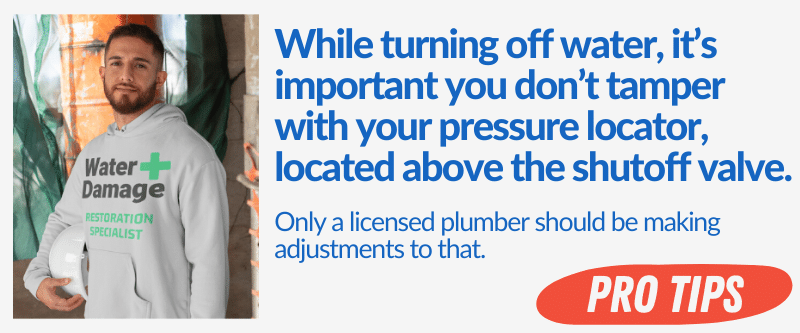
If the leak is determined to be coming from pipes, such as underneath a sink or behind the shower/tub, you’ll want to shut off the water source to your home. The shutoff valve to your water could be located in any number of places.
Look near your hot water heater, or if you live in a home with a basement try the interior wall where the water comes in from the meter. It could be as simple as a lever, or it could be a more traditional wheel-style valve, like you’d see when turning on a garden hose.
If you’re unsure whether you’ve successfully turned your water off, try turning on a sink (preferably one that wasn’t causing the leak). If it doesn’t come on, or comes on briefly and then runs dry, you have succeeded.
Can bathroom flooring swell up without there being any water damage?
Actually yes, that is a possibility.
Sometimes the source of the swelling lies within the laminate flooring being glued down in your bathroom. Once the glue has been laid, the water in the glue may cause the joins of the boards to swell slightly, resulting in the appearance of water damage when a leak is not present.
Typically this doesn’t last any longer than three to four weeks, and resolves itself.
How to repair a leak under your bathroom floor
If you’ve inspected your bathroom floor thoroughly and can’t find any visible signs of a leak anywhere, this might be an indicator of a leak underneath your flooring.
There’s a simple way to test this: find your water shut-off valve, and turn it off. Check your water usage via your water meter, then wait a couple hours.
Best case scenario, when you come back the meter hasn’t moved, which means the leak could simply be the result of spilling.
But if the meter says you’ve used water, that means that somewhere there’s a leak, most likely from underneath your floor.
In cases like these, the most common culprit is a leaking pipe. Leaking pipes are a rather serious issue, and it’s recommended you contact a professional as soon as possible. In the meantime, however, there are methods you can use to patch it.
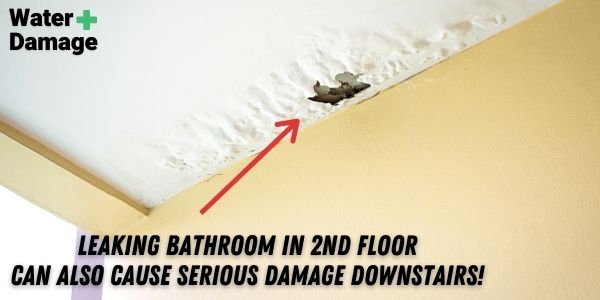
Tearing up your flooring to get to the leak can be costly, which is why it is generally recommended you approach it from below if possible.
See if you can spot any discoloration in the ceiling beneath the bathroom floor; typically the leak is right above it. Approaching from beneath is quicker and easier, but will require removing a portion of your ceiling.
Whether you’ve approached from above or below, the next step will be to locate the exact source of the leak.
If you haven’t already, you should have shut off the source of water to your house, or if you’ve discovered a single pipe leaking, turn off the water to that specific pipe if you’re able. This should hopefully help drain off some of the water and allow the area to dry as well.
There are a number of methods to repairing a broken pipe in your bathroom floor, the most elaborate of which involves using a pipe cutter and blowtorch to mount a copper repair sleeve.
Such work is strongly recommended for professionals only, but if you have access to the equipment, just be sure to clean the pipe inside and out around the leaking area to ensure its free of obstructions.
If you’re looking for an easier fix, other ways include…
Applying a water pipe epoxy: A common temporary solution after finding a leaking pipe, this is particularly geared towards cast iron piping. A great way for holding things together until a professional can come in and make a more permanent fix
Pipe wraps: Probably the most accessible of all the other fixes, most local hardware stores will carry these for this exact reason. Like epoxy, pipe wraps harden around the pipe to patch a hole or leak, just be sure it’s properly in place when applying.
Pipe wraps are all-purpose, and suited for all types of piping.
Pipe clamps: Another commonly recommended temporary fix, these clamps are frequently applied in a more commercialized setting, and will keep the pipe intact until a professional can address the problem with a more permanent solution.
Plumbing repair tape: Not dissimilar from the aforementioned pipe wrapping, plumbing repair tape is a good way to swiftly address the source of the leak while waiting for a professional to arrive.
Just wrap it around the leaking pipe in your bathroom floor, creating a makeshift seal over the troublesome area. Just be mindful that this will only last for a few days, so employing this fix should be done in conjunction with scheduling for a professional to come make a permanent repair.
How to repair water damage to your bathroom floor
We will go over different types of flooring options you might have in your bathroom. We will go over each in more detail as repairing your water damaged bathroom floor will largely depend on what kind of flooring you have installed.
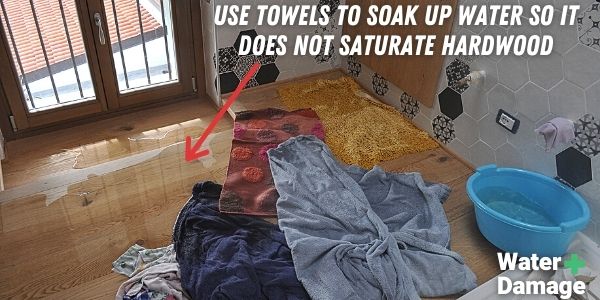
Hardwood floor repair in bathroom
You might be able to get away with nailing or screwing the boards back in to place, if only a few of them are warped, cupping, separated, etc.
Key word being “might.” If this doesn’t work, however, chances are you’ll need to acquire some matching wood to replace the floor boards with, or the damaged section of the floor if necessary.
You’ll need to move things off your bathroom floor, even items that you normally wouldn’t consider “moveable” such as the toilet and any cabinetry, and you’ll want to do so carefully so as not to damage the items themselves or any intact flooring.
If there is an entire damaged section that needs replaced, you can attempt to replace it yourself if you’re comfortable doing so.
At a certain point, depending on the size of the area of your bathroom, it becomes more cost effective to simply replace the flooring, so that’s something you’ll want to consider as well.
You’ll need to use a pry bar to remove the damaged planks, and once the damaged area has been safely removed, ensure all subflooring is dry before nailing replacement planks to the floor.
If the subfloor of your bathroom is damaged, you’ll need to decide if you’re comfortable with replacing that on your own as well, because the process will entail sawing into the flooring to replace it along with any water-damaged floor joists of your bathroom.
If the thought of sawing out a portion of your subflooring seems overwhelming, it might be best left to a professional.
But if you’re just replacing floor planks, as long as you work carefully you should be able to get them out and replace them without too much trouble.
Laminate floor Repair in Bathroom
Unfortunately with laminate flooring, they tend to have multiple layers that do a tremendous job of absorbing any moisture, which leads to them swelling and separating.
See our Full Guide: Laminate Floor Water Damage
As soon as you’re able, bring in fans and dehumidifiers (if you have any) to dry the floor. Damaged laminate flooring will start to show signs as such within a few days or even hours!
After a few days, if it is necessary to make repairs, it is recommended to start with the boards near the closest wall. If you’re lucky some of the boards might be reusable, but its best to err on the side of caution if you’re unsure whether a board is reusable and just replace it.
You’ll want to be sure to inspect the subflooring, and if it shows signs of damage you’ll be faced with the prospect of fixing or replacing it as well. As always, do what you’re comfortable with, and if you feel like you’re getting in over your head get in contact with a professional.
Water Damaged Tile floors in bathroom
Generally speaking, tile flooring is incredibly resistant to water, but that isn’t to say water can’t manage to seep through cracks in the grout and could wind up damaging your subflooring.
If the bathroom subfloor gets damaged it will swell, and in turn cause the tile and grout to crack/raise, which leads to even more water seeping through…you see where this is going.
If you spot tile damage, dry the bathroom floor as quickly as possible with any fans and dehumidifiers in your possession.
If you feel confident your subflooring is still in good condition but spot some loose tiling, you can easily pry them up off the floor with a flathead screwdriver.
Be careful in doing so, as they can break easily and you may be able to reuse some of them. Scrape any dried grout from the bottom of the tile, and scrape it off the bare spot on the floor as well.
If you don’t have any extra tiles on hand, now is the time to stock up and get some for the future, just in case. Or, if fortune favors you this day, the contractor that installed the tiling might have left a partial box of extra tiles for the homeowners somewhere.
Either way, you’ll want to match the grout as closely as you can while installing the new tiles.
Vinyl & Linoleum flooring Repair in Bathroom
Vinyl and linoleum both handle excess water well, so you’ll start by removing any water and drying the bathroom floors with fans and humidifiers.
From there, the simple application of a utility knife can cut an outline around the damaged area with a straightedge, and you can use a flathead screwdriver to pry it up from your bathroom floor.
Oftentimes you can reuse vinyl or linoleum, but the main thing here is to ensure the integrity of the subflooring.
The last thing you want is the wooden subfloor underneath to swell with water, or shrink as it dries.
If the subfloor of bathroom is damaged, it’s decision time as to whether you replace it yourself or call in an expert.
But as for the vinyl, it’s as easy as taking your time to ensure it’s lined up correctly, and using quality adhesion to secure the patch to the flooring.
From there, application of a waterproof sealant such as that in a sealing kit will ensure water doesn’t leak through the cracks between the patch and the original flooring.
Repairing water damaged floor around the toilet
If you’ve spotted some minor wood rot around your toilet, that doesn’t necessarily mean you have to replace the subfloor.
In minor cases, you can resolve the issue by installing metal support flanges. If the bathroom flooring is rotted more than an inch beyond the flange, however, you’ll want to replace the flooring around the toilet.
There will be some things you’ll need, so you’ll want to gather them beforehand. That list includes…
- Phillips head screwdriver
- an adjustable wrench
- Drill
- a set of drill bits
- a metal flange support
- stainless steel screws
- a wax ring, specifically for toilets
With your materials gathered, the process is a simple one. Install the two-piece flange support just beneath the toilet flange itself, which will transfer the load of the flange, toilet, and any occupants onto the solid wood surrounding it.
Need help with Repairing Your Bathroom Floor?
Call 844-488-0570 for a Risk Free estimate from a Licensed Bathroom floor Water Damage Restoration Specialist in your area.
We Can Help Remove the water, Dry out & Repair your Bathroom floor.
Repairing Water Damaged Subfloor in your Bathroom
As stated before, replacing subfloor in your bathroom is something you’ll want to consider carefully before doing it on your own.
First Read our Guide: Drying out Wet Subfloor
It will involve a somewhat extensive list of tools, including…
- Eye protection
- Gloves
- Circular saw
- A Carpenter’s straightedge
- Tape measure
- Galvanized nails
- A hammer with cat’s paw for nail removal
- Plywood 5/8” thick
- 2×6 lumber
It should go without saying, but exercise extreme care and caution when operating any tools such as a circular saw.
Along with other miscellaneous items, such as a pencil for marking. If this list seems too extensive, it might be time to call in an expert. But if you’re committed to this, here’s a general outline of what you’re going to do.
Using your circular saw, you’ll set it to 1” depth and use it to remove the damaged area of your bathroom subfloor. From there, remove any protruding nails with a pry bar and vacuum away any debris.
If you remove the subfloor and find there’s still moisture, you’ll want to give it time to dry completely before continuing with the process. If you find mold in your subflooring, you should contact a professional immediately as this could indicate a much more serious issue.
With the damaged subfloor of your bathroom removed, you’ll use the 2×6 lumber to act as framing for the floor to support the new subfloor. Once they’re in place, you’ll measure and cut a piece of the 5/8” plywood to fit the section, and act as the new subfloor.
It is recommended that you leave a 1/8” gap between the existing subfloor and the new plywood to allow for any expansion that may occur.
Last but not least, you’ll use the galvanized nails to affix the new subflooring to the framework you’ve created.
A daunting process for your average homeowner, but if you feel up to the challenge the process is relatively straightforward.
Rotten subfloor in your bathroom
If your subflooring is rotting, you’ll want to either replace it or have it replaced right away. Rotting floors are dangerous, and could lead to much more severe problems. To replace rotting floors, follow the guidelines outlined in the subflooring section above, but if you think the issue might be more severe than you’re equipped to handle, call a professional right away.
How to prevent water damage on bathroom floors
Preventative measures are always best, and here are some ways you can avoid future and further water damage to your bathroom flooring.
Regularly check for signs of leaks: This includes discoloration on the walls or your bathroom floors, whether there’s any drywall bubbling, or any musty smells. Be sure to look under vanities and ensure the J-trap isn’t leaking.
Cracked, broken, or missing tiles: Should be repaired or replaced immediately. They’ll allow water to seep through, and get to the flooring beneath them. Cracked or decaying grout should also be replaced, as well as any caulking along your tub, shower, or sinks.
Test valves regularly: Anywhere they’re found in the bathroom, be it a toilet, shower, sink, or bathtub. Do a visual check for wetness or any staining nearby that could indicate a leak.
Update old fixtures: Old showerheads can use up to twice as much water as newer models, and old faucets can wear over time, leading to water leaking through. Updated fixtures will save water, and help prevent water from getting where it shouldn’t be.
Use your exhaust fan: This may seem like a no-brainer, but seriously. Keeping your exhaust fan on serves a real purpose; it pulls moisture out of the air, and prevents it from getting into your walls.
Mitigate as much tub-splashing as possible: Especially important if you have children. Try to reduce water splashing outside of the tub as much as you can, but if spills do occur be sure to wipe them up as soon as possible.
Torn shower curtains should be replaced, and damaged shower doors should be repaired or replaced as soon as you’re able.
How much does it typically cost to repair a water damaged bathroom floor?
On average, most water damaged flooring repair ranges from $450 up to $7,000.
Various things such as the size of the area of your bathroom floor, the extent of the damage and exactly what kind of damage has occurred, all factor in to the overall cost of having water damaged floors repaired professionally.
Additionally, homeowner’s insurance will generally pay for water damaged bathroom flooring to be repaired or replaced with flooring of a similar type and quality.
In particular, this often applies to hardwood flooring, however your claim might be denied if they determine it to be a “long-term leak,” meaning any leak that has lasted longer than 14 days, so it’s really in your best interest to address any water damage sooner rather than later.
If you have questions about water damage to your bathroom floors (or in some cases ceiling), contact your insurance provider.
When should I call a professional?
Whenever you don’t feel comfortable performing any of the repairs outlined above on your own.
While some repairs on your bathroom floors can be easy to fix and won’t require much in the way of tools, materials, or previous experience, if a job feels overwhelming or you’re worried you may end up doing more damage than actual repairs, give us a call.
We offer water damage restoration, completed by professionals that are committed to your complete satisfaction.
Our emergency hotline is open 24/7, because pipes don’t always burst during normal business hours, so give us a call any time because what may seem overwhelming to you is what we specialize in.
We have Water Damage Restoration Technicians that can help Stop the Leak, Dry out & Restore your Bathroom Floor and Subfloor.
For Disasters of all Sizes,available in 95% of USA