
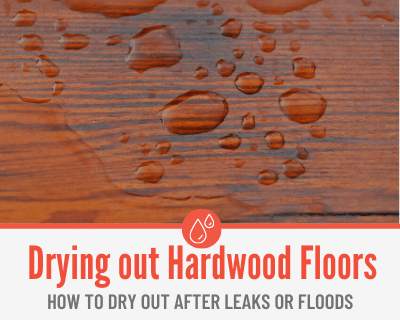
Wet Hardwood Floors after a Leak or Flood? Trying to Rescue your Hardwood floors from Water Damage and need to Dry them out?
In this Guide you will Learn:
- If hardwood Floors can get wet,
- Common Causes & What happens When Hardwood Floors Become wet,
- How To Dry out Hardwood or Engineered Wood Floors,
- Drying out Water UNDER hardwood Floors.
Can hardwood floors get wet?
Hardwood Floors can get wet to a certain extent for a set amount of time before any permanent water damage occurs. This however will depend on the type of Hardwood Floors you have.
Believe it or not, there are two types of hardwood flooring, so let’s examine those two types a bit closer.
Solid wood flooring
When it comes to solid wood flooring, the name says it all. Made from solid planks of hardwood like oak, walnut, or maple, solid hardwood is thicker than its engineered alternative, and because of that it can be sanded and refinished multiple times over the course of the floor’s lifespan.
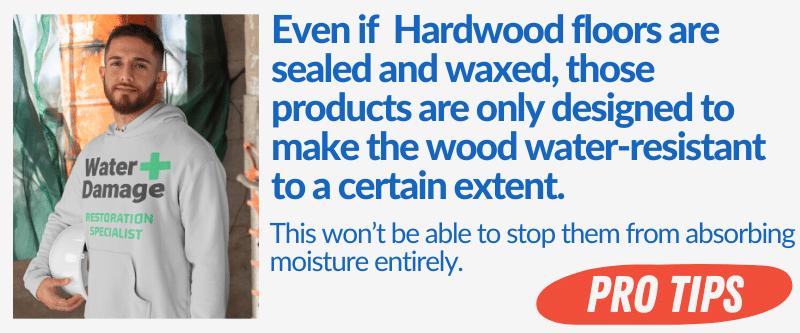
If exposed to water, the porous nature of the wood means it will absorb moisture quite easily. Even small spills that might seem trivial can lead to staining. If allowed to absorb too much moisture, serious damage can occur, such as:
• Warping
• Cupping
• Buckling
Not to mention the planks can begin to swell, causing uneven floors and even potential risk of injury (splinters from a hardwood floor can easily travel through a sock, and are extremely painful).
If your hardwood floors dry and are still warped, cupped, or showing signs of the wood deteriorating on the surface or in the gaps, it is likely time to have them replaced.
To avoid having to replace your hardwood floors, it’s important to remove as much excess water or moisture as soon as possible and to employ proper drying techniques to try and save as much of your flooring as possible.
Engineered wood flooring
Like its solid counterpart, engineered flooring is often made with real hardwood, though there are variations thereof. Engineered hardwood is designed to be easily installed, usually with special interlocking edges built into the material itself, and is much thinner than its solid counterpart.
While typically cheaper than solid hardwood, some types of engineered wood flooring are made with a layer of real hardwood on top and Medium Density Fiberboard (MDF) underneath.
MDF is almost exclusively used indoors specifically because of its poor resistance to moisture. If your engineered hardwood floors get wet, you can expect:
• Swelling
• Separation of planks
• Cracking or breaking
• Increased risk of damage to your subfloors
• Uneven flooring
There is, however, a much more reliable variant of engineered floors that uses soft plywood underneath. The soft plywood versions are better able to resist water and moisture in general, and if they do get wet stand a much better chance of being dried out without having to replace them entirely.
As always, it is of the utmost importance you get any water up off the floor, and employ proper drying techniques to remove any remaining moisture to prevent such damage.
When considering engineered hardwood flooring, it’s important to consider the cost vs. the potential risk with each type.
Flooring made with MDF could save you money in the short term, but with its low resistance to moisture you could wind up paying more to have it replaced in the long run if any water damage occurs.
Engineered flooring also comes in less finish variations than solid wood, and compared to solid hardwood can only be refinished once or twice throughout its lifetime.
Any more than that and you’ll run the risk of sanding through the top layer of hardwood and permanently ruining the flooring. It is important to be sure of the thickness of your top layer before attempting to refinish an engineered wood floor.
Wet Hardwood Floors?
Call 844-488-0570 for a Risk Free estimate from a Licensed Water Damage Remediation & Restoration Specialist in your area.
We Can Help Dry out your Hardwood Floors and Repair Any Damage.
Common Causes Of Wet Hardwood Floors
Expansion and contraction is normal when it comes to wood, as it reacts to the environmental conditions around it.
When this happens to a severe extent, however, buckling and warping can occur, preventing it from reverting back to its original shape.
There are several common causes of moisture permeating hardwood flooring.
High Humidity
In environments of high humidity, you can expect your hardwood floors to react accordingly. Typically, hardwood floors are not recommended if you live in areas with high humidity.
Areas of the house prone to increased ambient moisture, such as bathrooms or kitchens, can exacerbate this problem.
As your wooden floor absorbs moisture from the air around it, the wood can begin to expand and buckle. Preventative measures such as fans and proper ventilation can help ward of the effect to an extent, but you may want to consider an alternative if you live in a humid area.
Water
The most common culprit of wet floors (we’re just as shocked as you are). Water can find ways to get to your hardwood flooring that you’d have never imagined.
Leaking through appliances such as a dishwasher or refrigerator, or even seeping up through a concrete subfloor.
Bathrooms in particular will likely be your largest source of moisture accumulation, so if you happen to have hardwood flooring in or near your bathroom, it is vital that you remain vigilant for any appearance of water or moisture, and take care of it right away before it has a chance to swell up your hardwood and cause buckling or other damage.
Improper Acclimation
Or a complete lack thereof. When first having your hardwood installed, it should go through the process of acclimation, where it’s left within the room it’s going to be installed in.
The process normally takes around two weeks, and is crucial when having new hardwood installed.
What this does is allows the wood to…well, acclimate to the temperature and humidity of the area. Dry as a room may feel to you, there’s still going to be ambient moisture in the air to some extent no matter how miniscule, and the hardwood will need time to adjust before its laid into place.
Failure to do so can result in cause issues similar to humidity damage, where the wood warps and buckles, in which case no amount of drying will be able to undo the damage at that point.
Allowing the hardwood to acclimate to the room for at least two weeks ensures that it won’t do any further acclimating once it’s installed.
How To Dry Out Wet Hardwood Floors After Water Damage.
To dry out wet hardwood floors, you’re going to need some equipment. Most of it shouldn’t be too expensive, but depending on how bad the water damage is, you could be looking at some somewhat costly purchases or perhaps a rental.
For starters, you’ll need:
- Towels
- A mop
- Clean rags
- Hardwood cleaner
- A wet vacuum
- Fans
- A dehumidifier
- Moisture testing meter
First things first, it’s imperative that you attend to the source of the moisture and ensure there isn’t any more water coming in.
Whether it be from a leak, a spill, or from flooding, if water continues to get in it will render all of your hard work meaningless.
You’ll want to remove any water-soaked objects from the floor. Things like rugs, mats, or any kind of furniture that are capable of retaining water will need to be gotten up off the floor.
What comes next may seem a little counterintuitive considering you’re getting your floors even wetter, but bear with us. You’re going to want to clean your hardwood, and this is where the mop and hardwood cleaner come into the equation.
This is mostly the case when the water damage is a result of flooding, but if the water has stagnated for any length of time, you should strongly consider cleaning them.
Utilizing hardwood cleaner has two main benefits. It washes away any debris or dirt that may have accumulated (especially in the case of flooding), which can harbor water and bacteria that could cause further damage to your hardwood.
It will also help kill any mold or mildew that might have begun to grow, preventing it from growing any further and sanitizing the area.
A good disinfectant cleaner that doesn’t produce suds, and a mop or scrub brush that won’t put scratches in your floor will be ideal for this application.
Follow the manufacturer’s instructions on the bottle of cleaner, and mop up as much excess as you can once you’ve finished.
The next step is to remove as much of the water from the flooring as you possibly can. This is where things like the wet vacuum and the dehumidifiers come into play.
Use the wet vacuum to suck moisture up out of the flooring. It may seem silly to be vacuuming a hardwood floor, but the goal is to remove as much standing water as possible from between the cracks where it likes to hide.
Even if you can no longer see any standing moisture, continue to vacuum until you’re certain you’re not pulling any more water out of that hardwood flooring.
Once that’s been done, you can move on to fans and the dehumidifier. If you can, use multiple fans from different angles, and keep them on the highest setting.
The goal here is to keep air circulating throughout the room, to help get moisture up and out of the floor.
As far as the dehumidifier goes, if you have more than one you’ll use the same approach. Having at least one will help tremendously, but having two or even three depending on the size of the room would be ideal.
Leave them running at the highest setting, and be sure to empty them as necessary. Again, the goal here is to remove as much moisture as possible, and having dehumidifiers running will pull moisture out of the air and the hardwood as well, so it’s important to ensure they continue to function properly.
Once the surface of the hardwood is completely dry, you’ll want to do a visual inspection for mold. Aside from the danger of severe allergic reaction among some people, mold is a dangerous health hazard whether inside a home or commercial building.
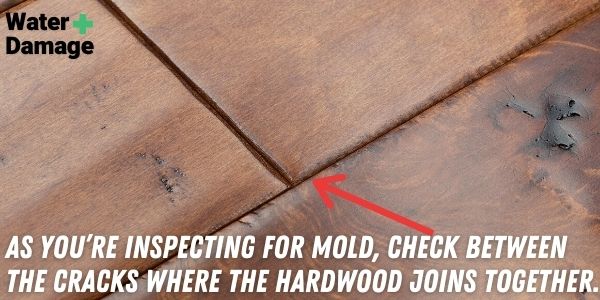
Mold can appear in a number of ways, whether it be a slight discoloration of the wood, an unusual looking stain, or even a fuzzy growth on the surface of the hardwood.
It can come in a number of colors, as well, such as black, white, green, brown, gray, or yellow. A common appearance of mold in hardwood floors is mottled black spots over a discolored area of the hardwood.
If mold is discovered, it should be treated right away. In some cases you can do this yourself; simply scrub the afflicted area with a water and baking soda solution until the mold is gone, then vacuum up any moisture and resume the drying process.
In other instances where the growth is more severe, a professional should be consulted to ensure it has been safely removed.
Lastly, once the floors are determined to be completely dry and mold free, you should check the flooring with a moisture meter. Bear in mind that this may still show moisture in the hardwood for as long as several weeks afterwards, depending on humidity levels and other outside factors.
If the moisture meter reveals there’s still water within the hardwood, just keep your fans and dehumidifiers running.
Under no circumstances is it recommended that you simply allow the floors to dry naturally. You’ll want to follow these steps as soon as possible, because if water is allowed to sit it will ultimately shorten the lifespan of your hardwood flooring.
In some cases, there’s a good possibility it will result in needing to replace sections of the floor, or even the entire room. That, and the likelihood of mold growing are reason enough not to sit back and wait.
So don’t turn those dehumidifiers and fans off after a couple of days, even if it seems “dry enough.” Trust the moisture meter, and save yourself the cost and hassle of having to replace your hardwood floors later on down the road.
What To Do If There Is Cupping/Twisting
Cupping occurs when water-damaged hardwood floors begin to rise up at the edges, producing a literal cupping effect. It’s one of the most easily noticeable signs of water damage, and in some instances, it can be repaired.
After following the outlined steps above for removing all moisture from the area, one option is to sand down the hardwood floor. This method isn’t recommended in severe cases, but if the effect is minimal, sanding the area can return the flooring back to its normal state.
This process can be a difficult one, however, and if you’re not careful you can wind up doing even further damage to your floors, such as causing crowning, wherein the wood is raised in the center and dips down along the edges.
When crowning occurs due to sanding, you are unfortunately left with no other option but to replace the flooring. If you are worried you may cause further damage or are uncomfortable operating the sanding equipment, don’t hesitate to contact a professional.
Hardwood Floors Needs Rescuing?
Call 844-488-0570 for a Risk Free estimate from a Licensed Water Damage Floor Restoration Specialist in your area.
We Can Help Dry out & Repair your Hardwood Flooring!
How To Dry Out Floors After A Large Flood, Hurricane Or Storm!
When dealing with heavily flooded or water damaged floors, the first 24 hours are crucial. The more time your hardwood spends in contact with water, the more severe the damage will end up being.
You’ll need to move quickly, and you’ll need to act now, and hopefully you’ll be able to avoid having to replace some or all of your hardwood flooring.
Generally speaking, you’d be better off contacting a professional if you have serious flood damage to your floors.
While insurance may cover it in some instances, such as leaking appliances and the like, most homeowners don’t have insurance against flood damage, so in that instance there’s a good chance you aren’t covered.
Nevertheless, you’ll want to contact a professional as soon as possible, and to keep in mind that if this flooding was the result of a major storm, hurricane, or similar force of nature, places like these are going to be inundated with calls like yours.
Point being, it may take them some time to get to your house, and mold can start to grow within 48 hours if left unchecked, so you’ll want to take action in order to mitigate as much damage as possible.
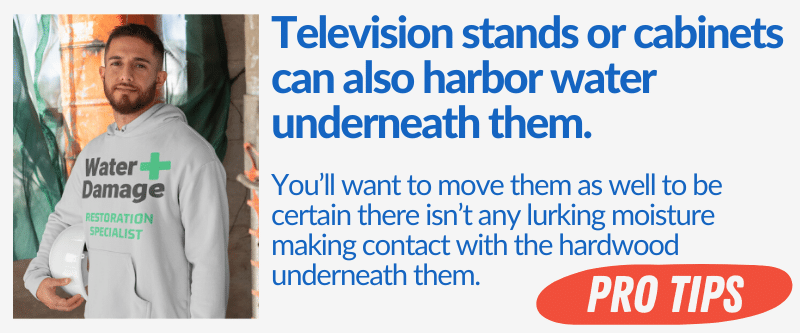
As before, you’ll take similar steps in drying out your flooring. Remove any wet objects from the area, such as rugs or furniture. Move stands and cabinets out of the way to check for hidden water beneath them.
Rugs will need to be washed in accordance with their washing instructions, and furniture such as the cabinets and tv stand should be relocated to a waterproof flooring, or at least somewhere with a piece of plastic under them to ensure they don’t transfer any more water to the floor.
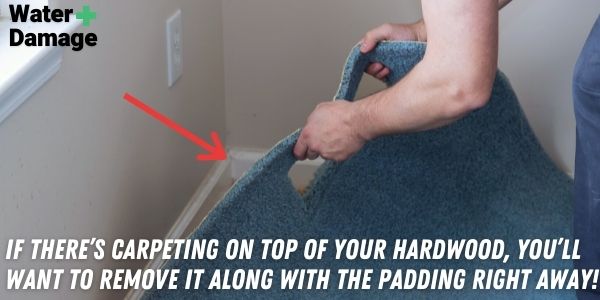
Carpeting and padding will hold moisture against the hardwood, and are an ideal environment for mold to begin growing, which will soon start to smell.
Check for tack strips, and make sure to remove those as well before you or any children in the house can step on them. If left to soak in water, they can begin to rust and wind up staining your hardwood flooring.
From there, you’ll resume the process of drying by vacuuming up as much water as you can with a wet vac. Be sure to get between the cracks, and don’t stop even if the floor looks dry until you’re certain you’ve gotten up as much as you can.
Then comes the disinfectant. Remember, suds-free, and use a mop or scrub brush that isn’t going to leave any scratches in your hardwood.
This is important because it gets rid of any lingering dirt or debris that might be harboring water, and helps kill off any mold that might have begun growing in the wood.
Once you’ve finished, go over the floor with the wet vac again to get the moisture out again.
Now it’s time to break out the tried-and-true combination of fans and dehumidifiers. Highest possible setting, and be sure to empty those dehumidifiers regularly. If there are any windows in the room, and the weather cooperates, open them a couple inches to allow for better circulation.
This may not be a good idea if it’s particularly humid outside, so use your best judgement. If you’re worried the humidity outside might be an issue, chances are it will be.
Air conditioning is another good way to help an area dry quicker, so if windows can’t be opened then running it a little cooler than usual is a good alternative. Cool air tends to be dryer, and having your air conditioning on along with running fans and dehumidifiers can be a good way to accelerate the drying process.
Keep an eye out for mold and mildew. If you see it start to spring up, you’ll want to hit it with a water and baking soda scrub, then vacuum the moisture out and resume the drying process.
It is imperative that you attack mold on sight, because if left unchecked it can cause a slew of health issues, not to mention cause irreparable damage to your hardwood floors.
Lastly, you’ll want to continue to monitor the hardwood with a moisture meter. Hopefully, if you’ve contacted a professional, you won’t have to wait too long.
But if there was recent flooding in the area and you’re on a waiting list, you’ll want to do everything you can to keep them as dry as possible, and monitoring the moisture levels in them will be an important step.
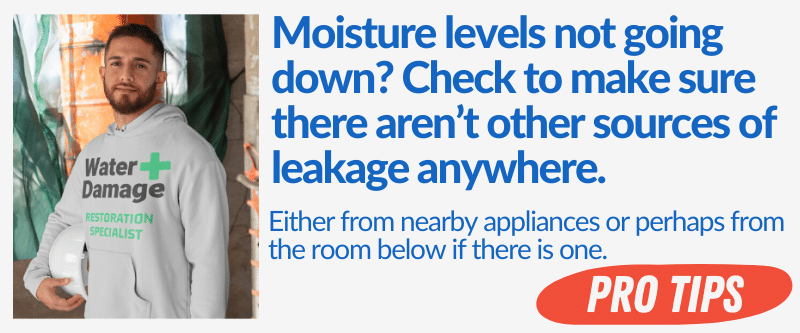
In the event of a humid room below, deploying some of your fans and dehumidifiers to the area would be prudent.
How Long Does It Take For Hardwood Floors To Dry After Water Damage Or Leaking?
Drying hardwood floors can be a slow process, depending on how much water was accumulated and environmental conditions like humidity.
Typically, it can take a few days for the hardwood floors to dry out, but in some cases can take as long as several weeks before all of the water has been removed.
The important thing is to not grow impatient, and to allow them the time they need to dry. Moving on to the next step before they’ve had time to fully dry will do more damage than good, especially if that next step involves sanding them down.
Leave your fans and dehumidifiers running, stay vigilant for signs of mold, and let the wood dry out.
The last thing you want is to rush the process, and wind up having to make costly repairs, or worse, having to replace your hardwood flooring entirely.
Drying Under Hardwood Floors
Drying out your subflooring is just as important as drying out your hardwood flooring, for obvious reasons.
Any moisture that comes in contact with your hardwood is a potential risk of damage, especially in the case of engineered hardwood where the underside is either soft plywood or MDF.
Earlier steps listed for the drying out process are effective for subflooring as well, but if you find yourself needing to dry out your subflooring, you’ll want to consider a few things.
To recap, the steps involved are as follows:
- Remove any rugs, carpeting, or furniture that are on the floor
- Clean the affected area with a suds free cleaning solution and a brush that won’t scratch
- Remove as much water as you can with a wet vacuum
- Position fans and dehumidifiers to continue the moisture removal process
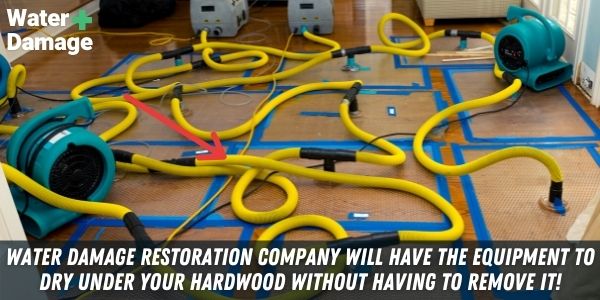
One main thing you can do to help with the drying of your subflooring, however, is removing a plank or two of your hardwood floor.
By removing one every five to ten feet or so, it will allow the air to reach the subflooring, and help them (as well as the dehumidifiers) in getting moisture and water out from underneath the hardwood.
Not only will this help your subflooring dry faster, but will also provide the additional benefit of giving the wood room to expand if needed.
This will help prevent buckling, warping, or cracking, and could potentially help save your hardwood floors in the long run, so the benefits are two-fold.
When removing planks, just be careful while doing so. The careful application of a prybar should do the trick. If you’re worried about doing damage to your hardwood, it’s likely best left in the hands of a professional.
Otherwise, once they’re up, you can resume the drying process where you left off:
- Use a moisture meter to check for moisture, and ensure the floors are completely dry
- Have patience, as the process could take several days or even weeks
- Reaffix loose planks with nails, glue, or whatever was used during installation
- Sand down uneven areas, using extreme caution in the case of engineered hardwood
When Should I Call A Professional?
There will come a time when the cost-saving benefits of doing it yourself are outweighed by the risk of further damage, or by the severity of the damage to begin with.
If you’ve experienced severe flooding in your home, and the water laid stagnant for more than a day, it is recommended you call in a professional at least to help assess the damage and look for any potential structural hazards.
First and foremost, you want to make sure the integrity of your floors hasn’t been compromised, and that they’re safe.
Another good indicator it’s time to call in an expert is if there is extensive mold growth, as that could pose a serious health risk to anyone in the house.
Mold and mildew should never be taken lightly, and if you find that the water and baking soda concoction just isn’t cutting it, it’s time to reach out and get ahold of a professional.
All that being said, the best indicator is your own instincts. If you felt confident at first, but start to feel more and more like you’ve gotten more than you bargained for as you go along, stop sooner rather than later and give someone a call.
Nearly as important as knowing what to do is knowing when to stop and ask for help. The sooner you ask for help, the sooner it can arrive, and when it comes to water and hardwood flooring time is of the essence.
We have Water Damage Restoration Technicians that can help remove Large amounts of Water, Dry out your Hardwood and Restore your Flooring.
For Disasters of all Sizes,available in 95% of the USA.