
This guide is for people with large bubbles or “blisters” of water in their walls between the drywall and paint.
The advice herein also works for people who have smaller bubbles in their paint due to minor moisture problems.
Not Only we will Cover the Most Common causes of Water Bubbles in Walls, but also How to Safely Deal with the water bubbles & repair the Water Damage afterwards.
Most Common Causes Of Water Bubbles in Walls
The most common causes of water bubbles in walls, or “water blisters,” is leaking from the roof, windows, damaged or leaky pipe.
Large Water Bubbles in walls can also be caused by partial flooding on upper floors that occur by overfilling a sink, tub, or toilet.
If you have Tiny Small bubbles in your paint, these can be caused by excess moisture in the room or it could also mean that your walls are mold-damaged.
Roof Leaks
Roof leaks are by and large the most common cause of a water bubble in walls.
Whether it’s rainwater or snowmelt, an old or damaged roof can let a lot of water into your home that may be deposited in your walls behind the paint.
It is recommended that you have a professional handle the roof repair to prevent further leakage, as roof work can be very dangerous.
Windows
Just as roofs can leak water into your home, so too can windows.
Ill-fitting, poorly installed, or poorly sealed windows can let a lot of moisture into your home.
Rain doesn’t always come straight down; sometimes it comes at an angle, encouraging the run-off to find cracks around your windows even if they are closed and locked.
Leaking Pipes
Damaged or leaking water pipes in your home can also lead to these water bubbles in walls.
There are at least two kinds of water pipes in your house: clean water and wastewater. More on the differences between the two later, but either types of pipe can leak or rupture, and result in water damage to your walls and formation of water bubbles.
Overflowing Toilets
Overflowing toilets, tubs, and sinks on upper floors of a multi-story home or apartment building can also lead to water bubbles in your walls.
Whether it is the fault of your upstairs neighbor or a forgetful housemate, water has to go somewhere, and likely it is through cracks into the walls.
Mold/ excess moisture In case of Small Bubbles
If you have Minor Imperfections / small bubbles in walls it might not be due to actual water damage.
These often present if you have Excess moisture in your house combined with a poor Preparation of the Wall before it was painted.
Small bubbles in paint can also appear if you have an ongoing mold infestation in the area.
Should I pop Water Bubble in Wall & Safety of it
If you have the source of the leak rectified you will need to pop the large water bubbles in walls and drain the water out of them.
If you do not take steps to prevent future leaks, you are setting yourself up for future headaches and expenses, and may even be risking your health by allowing toxic molds to develop.
If it’s a roofing issue, hire a professional, as roof work can be very dangerous.
When it comes to determining if you should pop the water bubble yourself, consider the following:
Clean Water or Wastewater?
Clean water and wastewater are the two types of water pipes in your home, and it is important to know which of these two caused the bubbling.
Clean water and rainwater can be handled with relative ease, but wastewater is unsanitary, unsafe, and requires the involvement of a professional.
If you cannot determine what kind of water you are dealing with, it is always safer to involve a professional so you do not risk making yourself or others in your home seriously ill.
If the bubbling is from flooding on an upper floor, do your best to determine if the overflow came from a toilet, which likely means you require the involvement of a professional for the same safety reasons as leaky wastewater pipes.
If you know the bubbling was not caused by wastewater, you want to “pop” and drain it sooner rather than later.
- The longer you wait, the more gravity will do its work and pull the water down your wall, causing further damage and potentially warping your drywall.
- Waiting may also allow dangerous molds to grow, which should be avoided at all costs.
Some bubbles may be very large and require careful drainage. Some may be very small and be easier to drain, or even dried already.
Either way, if you are confident in your ability to paint and spackle, and the water is sanitary, you should consider popping the water bubbles in wall yourself.
Water Bubble in Wall?
Call 844-488-0570 for a Risk Free estimate from a Licensed Water Damage Restoration Specialist in your area.
We Can Help Pop & Drain the water Bubble as well as Repair any Water Damage.
How to Pop & Drain a Water Bubble In Wall
Note: If you have small bubbles in paint, these most likely won’t even have water in them so we can skip this step.
Once you have determined the source of the leak is not wastewater, it is time to “pop” and drain the water bubble in wall.
First step is to lay down towels and have a bucket ready for collecting the water. This is to prevent further damage to your floors or carpet.
If you have baseboards that are not watertight against your wall, consider applying painters tape as a simple seal.
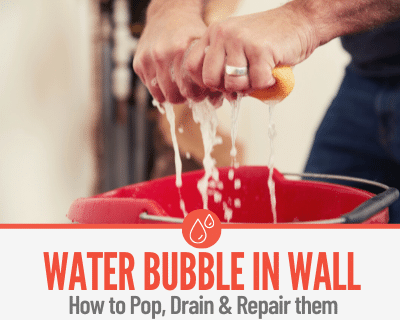
Next, find the lowest part or parts of the water balloon in the wall. Use a safety knife, or some other small cutting tool, to carefully puncture the lowest part or parts of the balloon.
Puncturing the lowest part lets gravity do most of the work for you at getting the water out. Have a bucket ready!
Gently press parts of the balloon to ensure all the water is out.
Catch as much water as you can in buckets and simply dump it outside or down your shower drain.
The towels should handle whatever you missed. Use dry towels or rags to wipe away excess moisture.
Repairing Your Walls Afterwards
Once the water has been drained from the water bubble, or in case of a small bubbling paint damage- it has already dried, remove all the loosened paint.
1.Remove Flaking Paint
You may need a paint scraper or similar broad, flat tool to get underneath the paint that has been loosened, stained, or damaged by the water.
Getting all the damaged paint off will expedite the drying process if there is still moisture in your wall.
Dispose of the removed paint flakes/chunks.
2.Dry it out
If there is still moisture in your wall or drywall, and the drywall has not been warped, ventilate the room as much as possible.
Place fans in the room pointed at the damaged part of the wall to expedite the drying process.
A space heater is a viable option ONLY if it is supervised for the duration that it is plugged in, and if it is kept away from all flammable substances.
Give it a day or two to dry out so the repair work may begin.
If you cannot see the moisture, gently press the drywall and run your fingers down it to feel for moisture. You will be able to tell once it is dry.
3.Apply 2x Coats of Filler & Sand
Once the damaged paint is scraped off and the wall is dry, it is time to repair back to it’s original condition.
First, mix some drywall paste, “mud,” or spackle.
Use a scraper to apply a thin, even layer over the entire damaged area, going over the parts where the paint was not damaged to create a uniform look.
Scrape it flat, and let it dry.
Gently sand the first layer to create a smoother appearance, and to help it grip the second layer. Wear a mask while you sand, and have sheets down to collect the dust.
Put a second layer over the first, thin and uniform the exact same way, and let it dry.
Gently sand the second layer, making it smooth and preparing it for primer.
4. Prime the Walls & Paint
Prime the damaged section of the wall, and let it dry. Remember painter’s tape for baseboards.
Paint over the primer with the right color paint, and let it dry. You may add a second coat if you wish. A little cleanup and just like that, you are done!
When to call a Professional
If you are not confident in your ability to take on this task, it is likely safer to contact a professional.
Doing a poor job cheaply is not always the best option if it ultimately devalues your home and ruins your interior decor.
If the water is wastewater or otherwise unsafe, contact a professional.
You should not risk harm to yourself or housemates/family members, and you don’t want your house to permanently stink of waste from poor or incomplete drainage and sanitation.
If you notice any mold already building up, it is best to contact a professional.
There are many kinds of molds and mildews that are toxic, and they can also cause further bubbling or staining on your wall down the line.
If your drywall is warped or otherwise damaged beyond repair, it is also usually best to contact a professional.
We have Water Damage Restoration Technicians that can help Fix the Source of the leak as well as repair any Water Damage caused.
For Disasters of all Sizes,available in 95% of the USA