
Worried there might be water Under your tiles?
In this guide you will learn:
- Common Signs of Water under tiles,
- What happens if water gets under different types of tiles,
- How to get water out under tiles and dry them out,
- How to Repair Tiles damaged by water under them.
Tiles are generally designed to be quite resistant to water, with the grout and adhesive used for them usually being quite good at keeping water out.
However, any sort of water leak or excessive moisture underneath the tiles can still significantly damage your home.
Can Water Get Under Tiles?
Most of the time, water shouldn’t be able to get under your tiles. The grout used to line the joint spaces between tiles is there for a reason – to keep everything nice and sealed, and protected from excessive moisture.
Despite this, it’s not uncommon to suddenly find water underneath your tiles, causing damage.
The reason behind this is usually one of two scenarios: you either have a water leak from some burst or misaligned pipes, or the grout around your tiles is too worn to keep water out anymore.
Signs Of Water Damage Under Tiles
Water damage under tiles may take some time to identify, but it’s not impossible. Here are the key things to look out for:
- Staining – Any sort of stain or discoloration appearing on your tiles may be a sign of water damage, especially if you’re able to rule out any other reasons for the staining (regular wear and tear from high-traffic floor areas, for example).
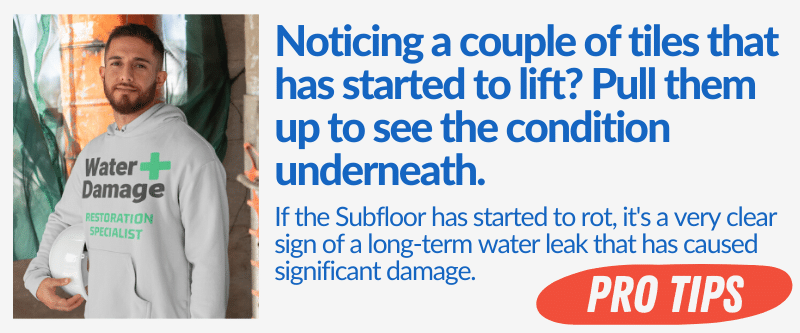
- Loose tiles – Water finding its way under your tiles will often cause them to become loose and unstable, so if you suddenly notice a tile that’s no longer sticking to the floor/wall as it should, you might have water damage.
- Hollow sound – If you suspect a leak under your tiles, try tapping them with a coin. If they sound hollow, chances are that there’s a leak and your tiles have become loose because of it.
Water Damage Under Tiles?
Call 844-488-0570 for a Risk Free estimate from a Licensed Water Damage Restoration Specialist in your area.
We Can Help Dry Out under your tiles & Repair any Damage caused.
What Happens If Water Gets Under Tiles?
Water getting under the tiles in your home is obviously going to cause some issues, but what exactly happens?
Well, it does depend on the type of tile and how long the water is present for – take a look at the examples below to get a better idea of how damaging this issue can be.
Water Under Ceramic Tiles
Ceramic tiles are pretty resistant when it comes to water damage, so they likely won’t be damaged by standing water under them.
The water can, however, damage the grout between the ceramic tiles as well as detach their adhesive, essentially making them come loose.
This could potentially result in some breakage if a tile falls off the wall, or if someone puts too much pressure on it when walking.
Water Under Porcelain Tiles
Porcelain tiles are, unfortunately, not completely waterproof – they are merely water-resistant, meaning that they will eventually allow water to seep through them if given enough time.
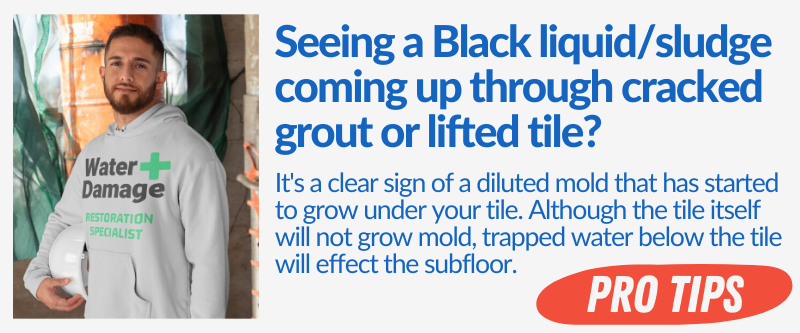
This allows for rapid mold growth underneath the porcelain tiles which can actually break them down, as mold eats away at materials it comes into contact with.
Water Under Marble Tiles
Overexposure of marble tiles to moisture can cause quite substantial damage, including discoloration and rapid weathering of the surface.
This may result in cracks and holes appearing on the surface of the tiles, often forcing you to completely replace them.
Water Under Granite Tiles
Like porcelain, granite is a pretty porous material so any water underneath the granite tiles will seep into them and start causing damage.
Mold growth and damaged grout are the most common issues with water-damaged granite tiles.
Water Under Kitchen Floor Tiles
One of the most common reasons for water under your kitchen floor tiles is some sort of burst pipe leaking water.
Most kitchens will have quite a lot of pipes, be it under your sink, or in the walls, or even under the tiled floor, so there are unfortunately many opportunities for a burst pipe.
Prevention Techniques
Preventing burst pipes in your kitchen can be a little tricky, especially since some of them may not be easily accessible. Despite this, you should try your best to have your pipes monitored regularly, either by yourself or by a professional.
Another prevention technique you can use is to try to keep your home as warm as possible, especially during winter. Frozen pipes are at the highest risk of bursting and leaking water under your kitchen floor tiles.
Water Under Bathroom Floor Tiles
Just like in your kitchen, one common cause of water under the floor tiles is a burst pipe. The leaking water will likely be coming from under your bathroom sink, or possibly from a heating pipe.
Another cause is the grout between the tiles being weathered enough to allow water to seep through and pool under the tiles.
Since the bathroom experiences quite high levels of moisture and often has water pooling on the floor from people leaving the shower, this can lead to significant water damage.
This is, admittedly, a much less common cause but it still can happen!
Prevention Techniques
If you can, try to keep an eye on the pipes in your bathroom to ensure they’re in good shape and replace them when needed.
Also, try your best to keep your home warm to reduce the risk of the pipes freezing and bursting.
To prevent water from seeping through the floor and under the tiles, keep an eye on the grout between your tiles.
If you notice any areas of it wearing away, replace it with some fresh grout to ensure it’s nice and sealed.
Water Behind Shower Wall Tiles
Most cases of water behind shower wall tiles will be caused by cracked or improperly sealed grout, allowing water to seep into the tiles and damage the adhesive.
Since the shower is constantly wet, this can become a huge issue very quickly.
Another less common but still very possible cause is a shower pipe bursting and flooding the area behind the shower tiles.
This can be quite disastrous if the substrate behind the tiles isn’t waterproof (which is, unfortunately, usually the case).
Prevention Techniques
Honestly, the most effective way to prevent this is to use proper installation techniques such as using a high-quality silicone sealant on the tiles and reinforcing the wall to make it waterproof.
However, we understand that the majority of you will have no way of doing this since you’re probably not installing your shower from scratch.
So, what else can you do? Most importantly, keep an eye on the grout between your tiles and replace it as soon as you see any signs of damage.
Also, as mentioned before, make sure that your home is kept warm to stop your pipes from freezing over and bursting during the winter.
Water Under Basement Tiles
A pretty common, but often overlooked, cause for water under basement tiles is groundwater seeping its way up to the bottom of your house and pushing up against the basement floor.
Once enough of this groundwater pools under your basement, it will start damaging the tiles from the bottom and even seeping through to the surface.
Another cause may be a burst pipe in the floor or walls, resulting in water leaking and pooling underneath the tiles.
Prevention Techniques
Preventing water from getting under your basement tiles is probably the trickiest on this list as it requires a lot more effort.
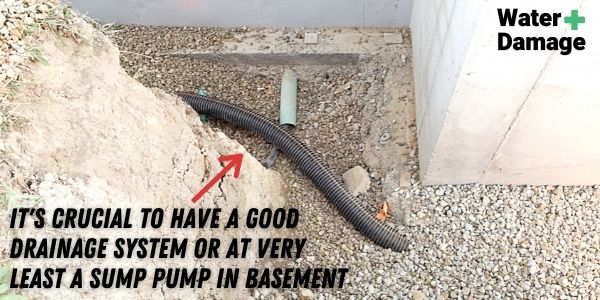
For example, stopping groundwater from seeping into your basement floor tiles would usually require installing some sort of drainage system.
As usual, keeping your home nice and warm should decrease the risk of your pipes bursting, especially during the winter.
How To Dry Out Water Under Tiles
What Do You Need?
- Small chisel
- Rubber mallet
- Wide putty knife/scraper
- Tile adhesive
- Pre-mixed grout
- Bleach
- Tile spacers
- Hard bristle brush
- Thick towels
- Rubber gloves
How Do You Do It?
- Grab your chisel and rubber mallet, and use them to gently remove the grout from in between the tiles.
- Repeat this with all of the tiles that have water underneath them. Make sure to set them safely aside for later.
- Lay down several thick towels to soak up the water – depending on how much water there is, this step might require some time and patience.
- Once all of the moisture is soaked up, we recommend giving the area and the tiles a clean with some bleach, to prevent mold from growing or to remove any mold that may already be present. Put on some gloves to protect your skin, then scrub the affected area with bleach and water using the hard bristle brush.
- Use the chisel and rubber mallet to carefully chip away at any tile adhesive present on the tiles or floor – you’ll want to create as smooth of a surface as possible to make re-applying the tiles easier.
- Apply the tile adhesive according to the instructions on the packaging and place down the tile, making sure to press down firmly. Insert the tile spacer around the tile to create a joint space, then repeat with each new tile.
- Allow the tile adhesive to set overnight. The next day, grab your pre-mixed grout and squeeze it into the joint spaces between each tile.
- Make sure to smooth the grout lines down and remove any excess with a damp cloth, then let it dry overnight.
Will Water Under Tiles Dry On Its Own?
Most of the time, water that’s made its way under tiles should not be left to dry on its own.
While it may be possible, you do run the risk of creating the perfect environment for mold to grow by allowing moisture to remain in one spot for a long period of time.
Therefore we recommend that you do not let water under tiles dry on its own.
Repairing Water Damaged Tiles
The steps you should take may vary depending on whether you’re working on floor or wall tiles, and how much damage they’ve sustained from the water under them.
What do you need?
- Small chisel
- Wide putty knife
- Chalk
- Utility knife
- Liquid detergent
- Wall tiles (if installing new ones)
- Cement board
- Cement board screws
- Thin-set adhesive
- Plastic spacers
- Pre-mixed grout
- Silicone caulk
How Do You Do It?
- Assess the damage – Your first step will be to assess the damage, as you don’t want to attempt to repair something that will just keep coming back. You’ll also want to know exactly how large the affected area is so that you can prepare accordingly.
- Remove the tiles – Once you know what you’re working with, you can start removing the affected tiles. If there’s any grout present in between the tiles, use a chisel to chip it away, then use a putty knife to carefully pry the tiles off the wall.
- Remove the damaged drywall – You should be able to just break off the soft, damaged drywall behind the tiles with your hands. Once that is gone, mark cutting lines on the remaining drywall using chalk, and use a utility knife to cut and remove it. You should be left with a rectangular or square hole in the wall.
- Clean the tiles – If the tiles you removed remained intact, you should soak them in a solution of warm water and liquid detergent to remove any old adhesive or drywall residue that may be on them. You can skip this step if you’re planning on installing completely new tiles.
- Install a cement board patch – Grab your cement board and use the circular saw to cut it down to fit the size of the wall cut-out. Leave about a ¼ inch between the cement board and the drywall, then fasten the board using cement board screws. The cement board patch will act as a replacement for the removed drywall, and should ideally protect the area from any future water damage.
- Fill the joint – To ensure the cement board stays securely fastened to the drywall and that the area is properly sealed against moisture, use some thin-set adhesive to fill in the ¼ inch thick joint between the two. Smooth everything down and allow it to dry for a few hours.
- Install the tiles – Here, you’ll either be using the old tiles you just removed (if they’re in good enough shape to be re-used) or some brand new tiles. Using the putty knife, evenly spread the thin-set adhesive over the wall, then begin installing the tiles. Make sure to use some plastic spacers between the tiles to leave space for grout lines.
- Grout the tiles and caulk the joints – Once the thin-set adhesive dries and the tiles are firmly in place, use some pre-mixed grout to fill in the spaces between each tile. Next, use silicone caulk to seal the gap between the bottom tile and the shower floor to ensure no more water will seep behind the tiles.
What’s The Easiest Way To Find A Water Leak Under A Tiled Floor?
Water leaks under a tiled floor might be a little tricky to identify at first, especially if there isn’t a large amount of water present yet. However, since it’s important to identify a leak as soon as possible, here are some things to look out for:
- Water pooling in unusual places – This may seem obvious, but if you suddenly find a pool of water in the middle of your floor with no clear explanation behind it, you may have a water leak under your tiles.
- Hot floors – A majority of water leaks are hot water leaks, so your floors may feel warm to the touch if there’s a leak in your home.
If you notice these signs you should try to fix the leak as quickly as possible.
Most of the time, the leak will be very close to the wet/warm spot on your floor, so removing that specific tile or a couple of tiles should help you to locate and fix it with ease.
When To Call A Professional
Getting rid of small amounts of water under tiles and even fixing the damage caused by a couple of waterlogged tiles should usually be easy enough to fix by yourself.
However, if the water keeps returning to the same area despite your best efforts or the area is simply too large to tackle by yourself, please don’t hesitate to call a professional!
If you have a fresh water leak/flood situation under your Tiles,and the tiles are not YET water damaged, it’s crucial to dry them out properly.
A water damage Mitigation company will have the required equipment to do it before the water can cause any damage to the tiles.
We have Water Damage Mitigation & Restoration Technicians that can help fix the source of the water leak, Remove water under the tiles & Repair any water-damaged tiles.
For Disasters of all Sizes,Available in 95% of the USA.